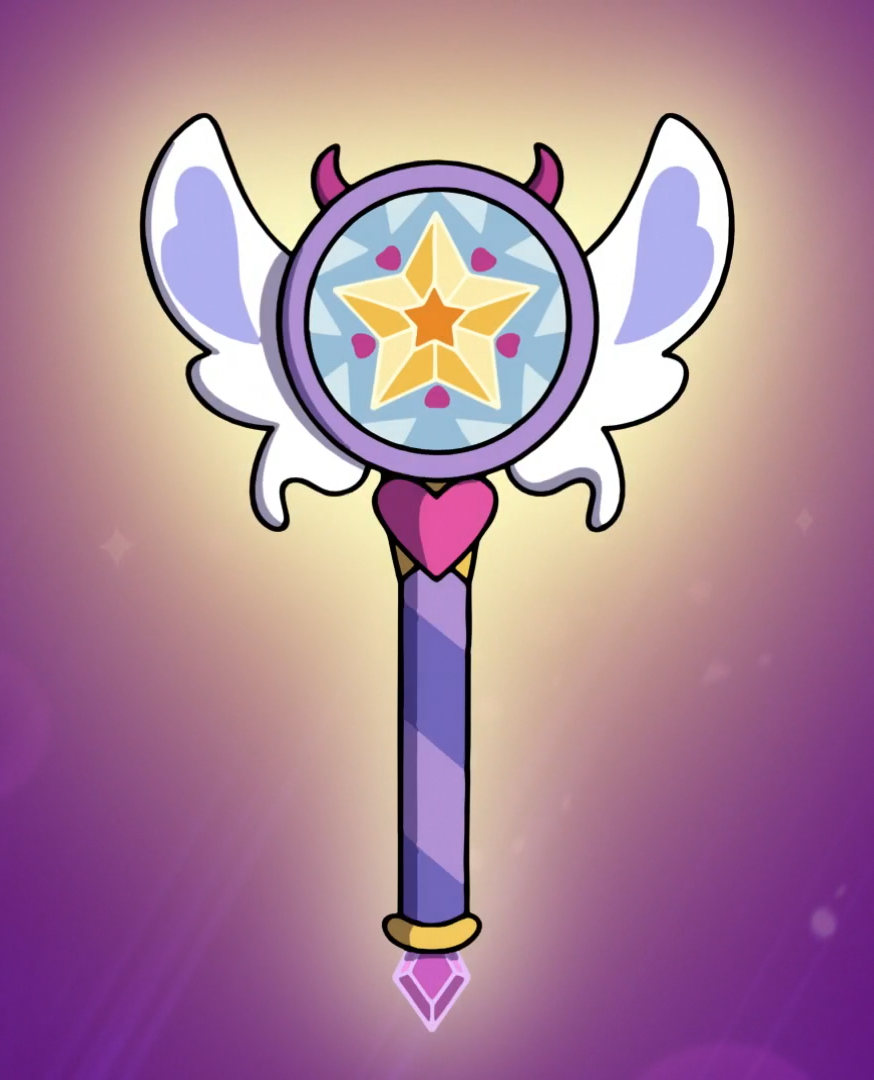
Star Butterfly’s Wand Tutorial
| Supplies Needed | Tools Needed |
|---|---|
| Duct Tape Stock Paper EVA Foam (Different Sizes and Thickness) PVC Pipe (Wand Handle) LED Battery Operated Light Set (optional) Clear Ornament Balls BARGE Cement Glue Crayola Hardening Clay Paints (Assorted Colors: Pink, Purples, White, Blue) Wood Glue Glue Gun Sticks | Soldering Iron Glue Gun Paint Brushes Dremel (With numerous attachments) Sander / Sanding Paper Box Cutter / Exacto Knife Safety Glasses Face Mask |
Step 1 – Cutting the PVC
Cut the PVC pipe to a size desired. Sand it down and spray down with a primer.
Step 2 – Ornament Balls
I found it best to sand them down on one side (the back). If you have a heat gun, you can use this to melt the bottom of the ornament so the PVC pipe will fit inside and close properly. I would highly recommend doing this outside, as it does smell and can be toxic.
Step 3 – Painting / Priming
You can now paint the back of the ornament ball. I used a small LED light inside the wand so it can light up. You can glue the lights and batter pack inside the ornament ball to keep out of sight. I glued one side of the PVC pipe to the ornament so everything would stay in place, but can still open the ornament to change the batteries as needed.
Step 4 – Cutting out the foam
I drew all the wings and other misc pieces for the wand out of very thin foam. You will be able to hot glue these on as a last step.
Step 5 – More Painting / Stripes
Add the stripes to the PVC, I used tape to outline the lines and make everything even.
Step 6 – Let it dry!
Let everything dry, and then lightly spray with a top coat to protect all the paint and add a light shine to the wand.
Step 7 – Wrapping Up
Enjoy! Our wands held up at SDCC and Disneyland all day 🙂
Estimated Cost: $50.00
Estimated Time to Complete Project: 8 hours
Your estimated cost may differ if you do not already own all the tools needed to complete this project.
Completed Project
